Air001开发板入门
大约 1 分钟
连上开发板
使用串口连接上板子USB另一头的串口引脚,具体可以参考:使用串口下载
如果购买了合宙的DAPLink调试器
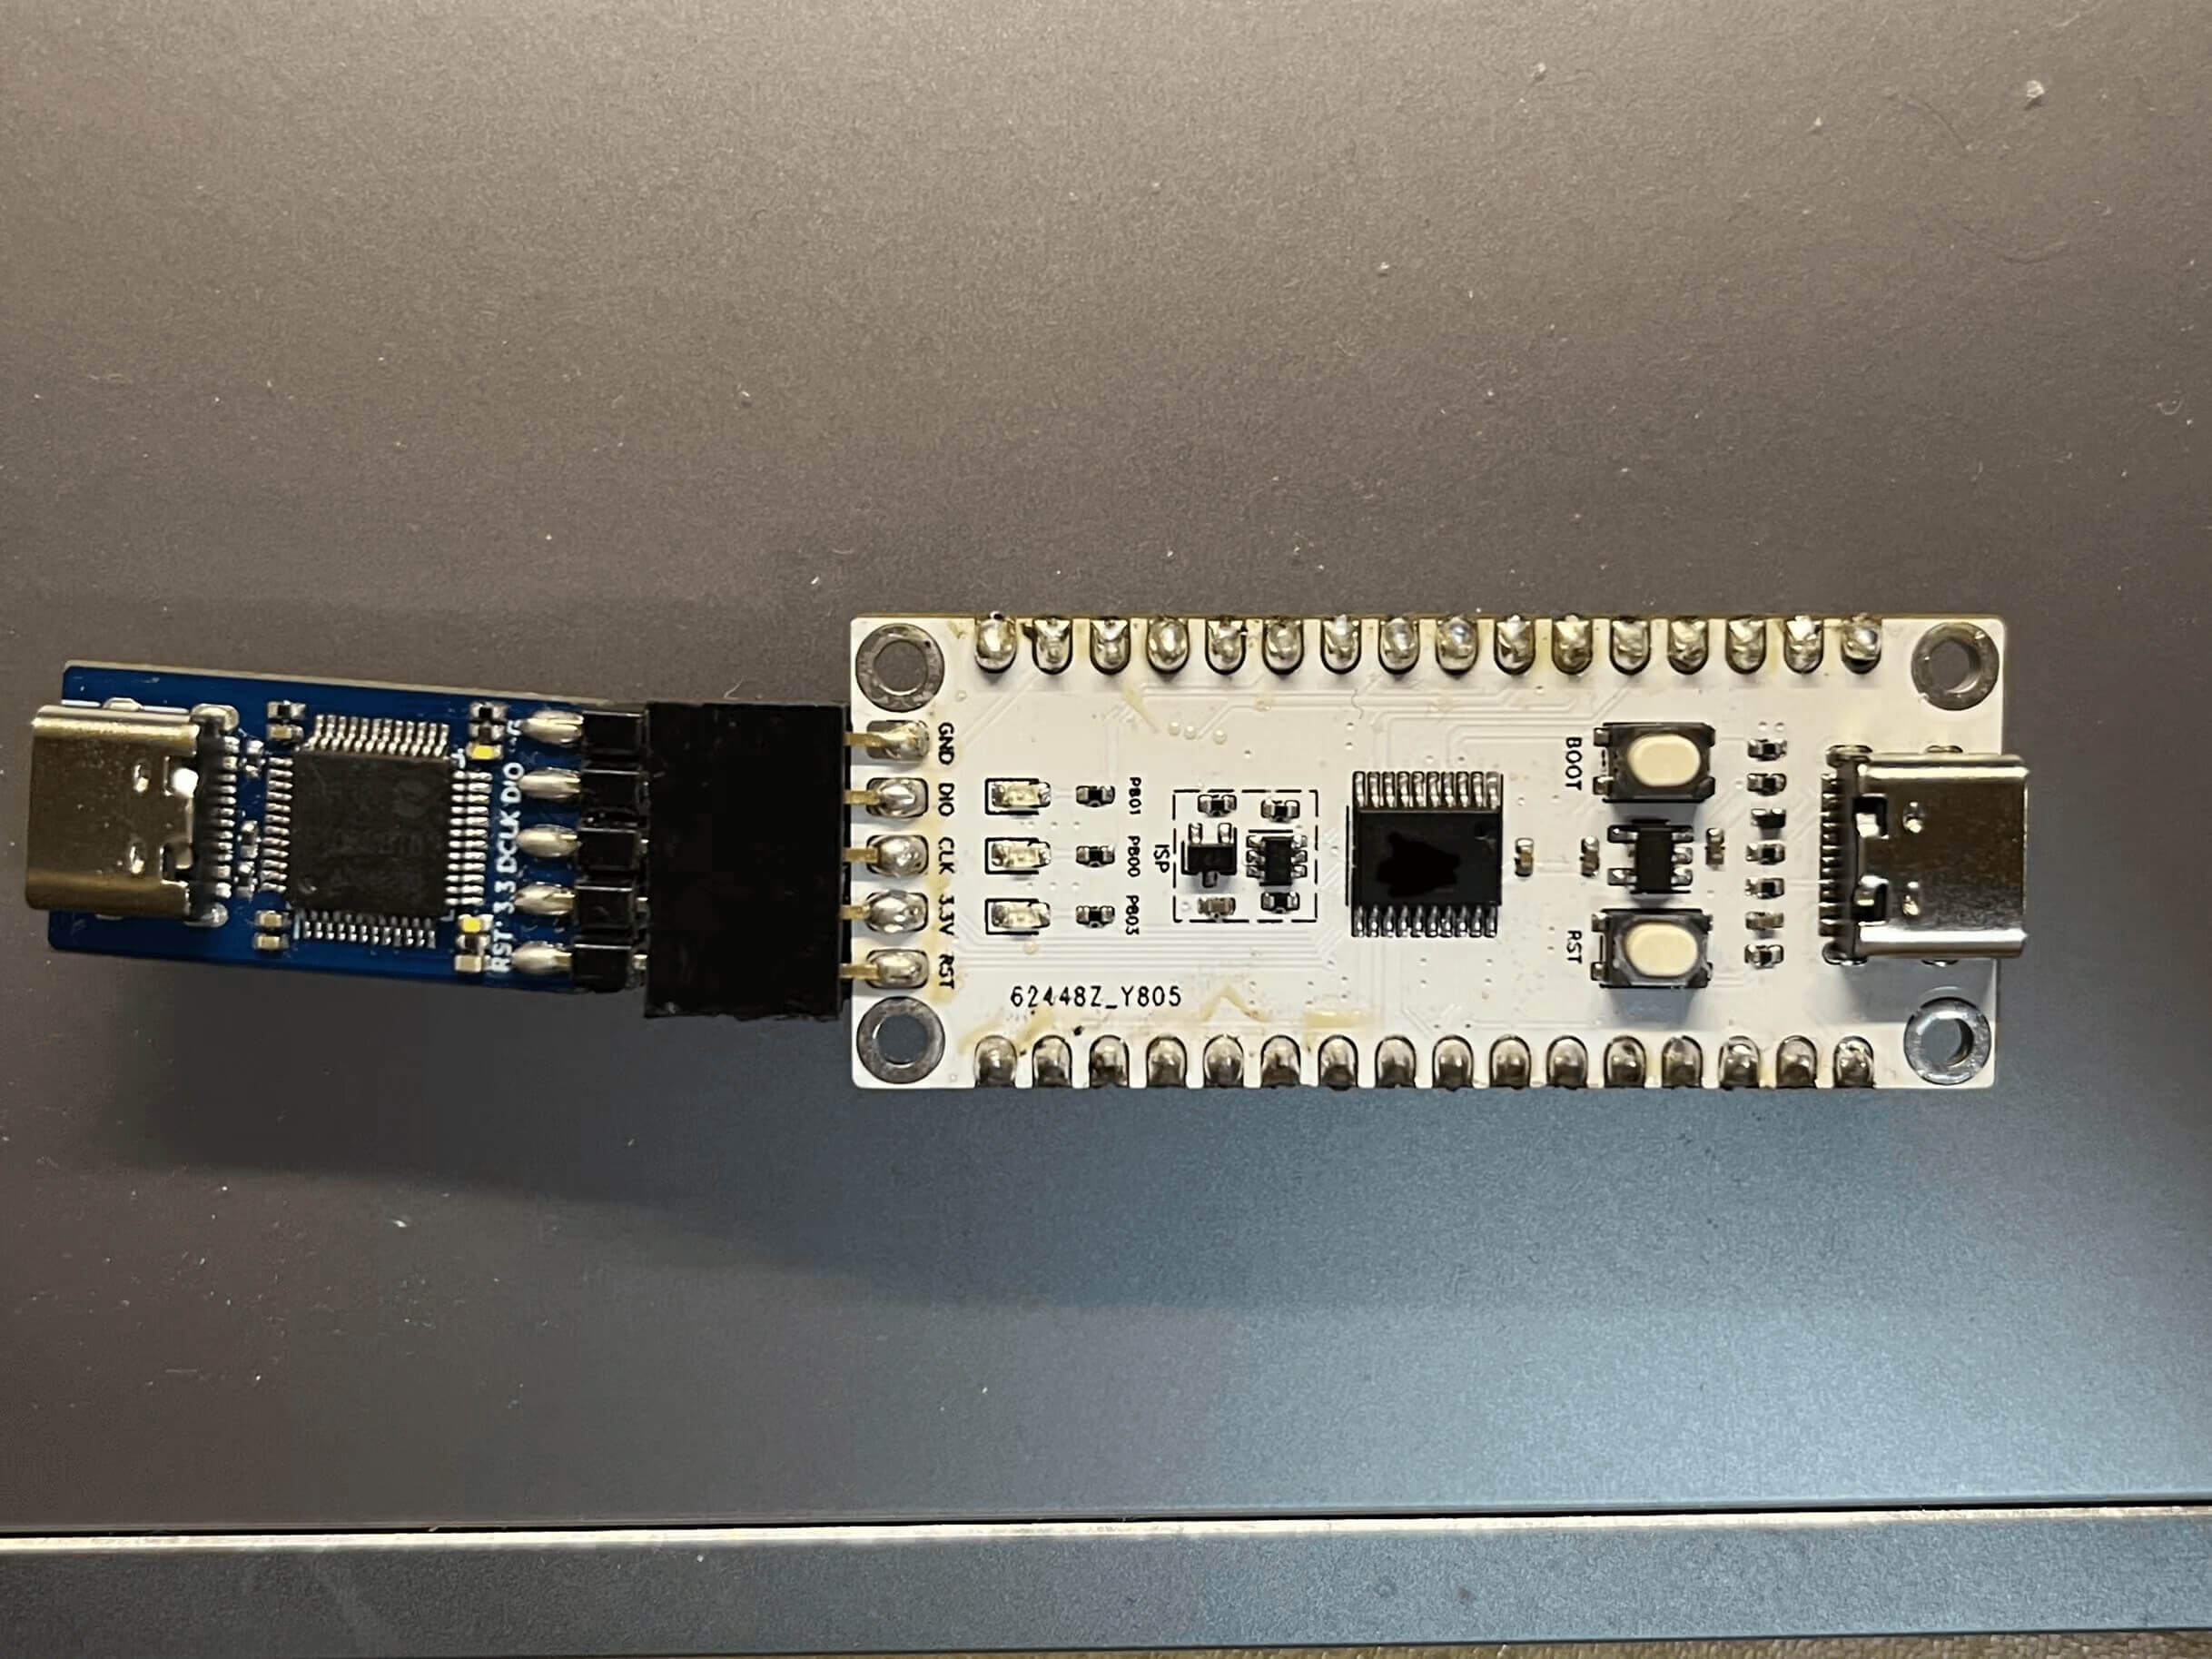
如果是购买的小白板和合宙的DAPLink调试器,可以直接通过排针排母相连,方向如图所示

连接后,保证开发板有供电,开发板选择AirMCU-Air001 Board,端口选择连接的串口
添加代码
在主函数中添加一些测试代码
void setup() {
  // put your setup code here, to run once:
  pinMode(PB_0, OUTPUT);
  Serial.begin(115200);
  Serial.printf("Hello, Air001. \n");
}

void loop() {
  // put your main code here, to run repeatedly:
  static int count = 0;
  if (count % 2 == 0) {
    digitalWrite(PB_0, HIGH);
  } else {
    digitalWrite(PB_0, LOW);
  }
  Serial.printf("This is NO.%d print. \n", count);
  count++;
  delay(1000);
}
编译下载
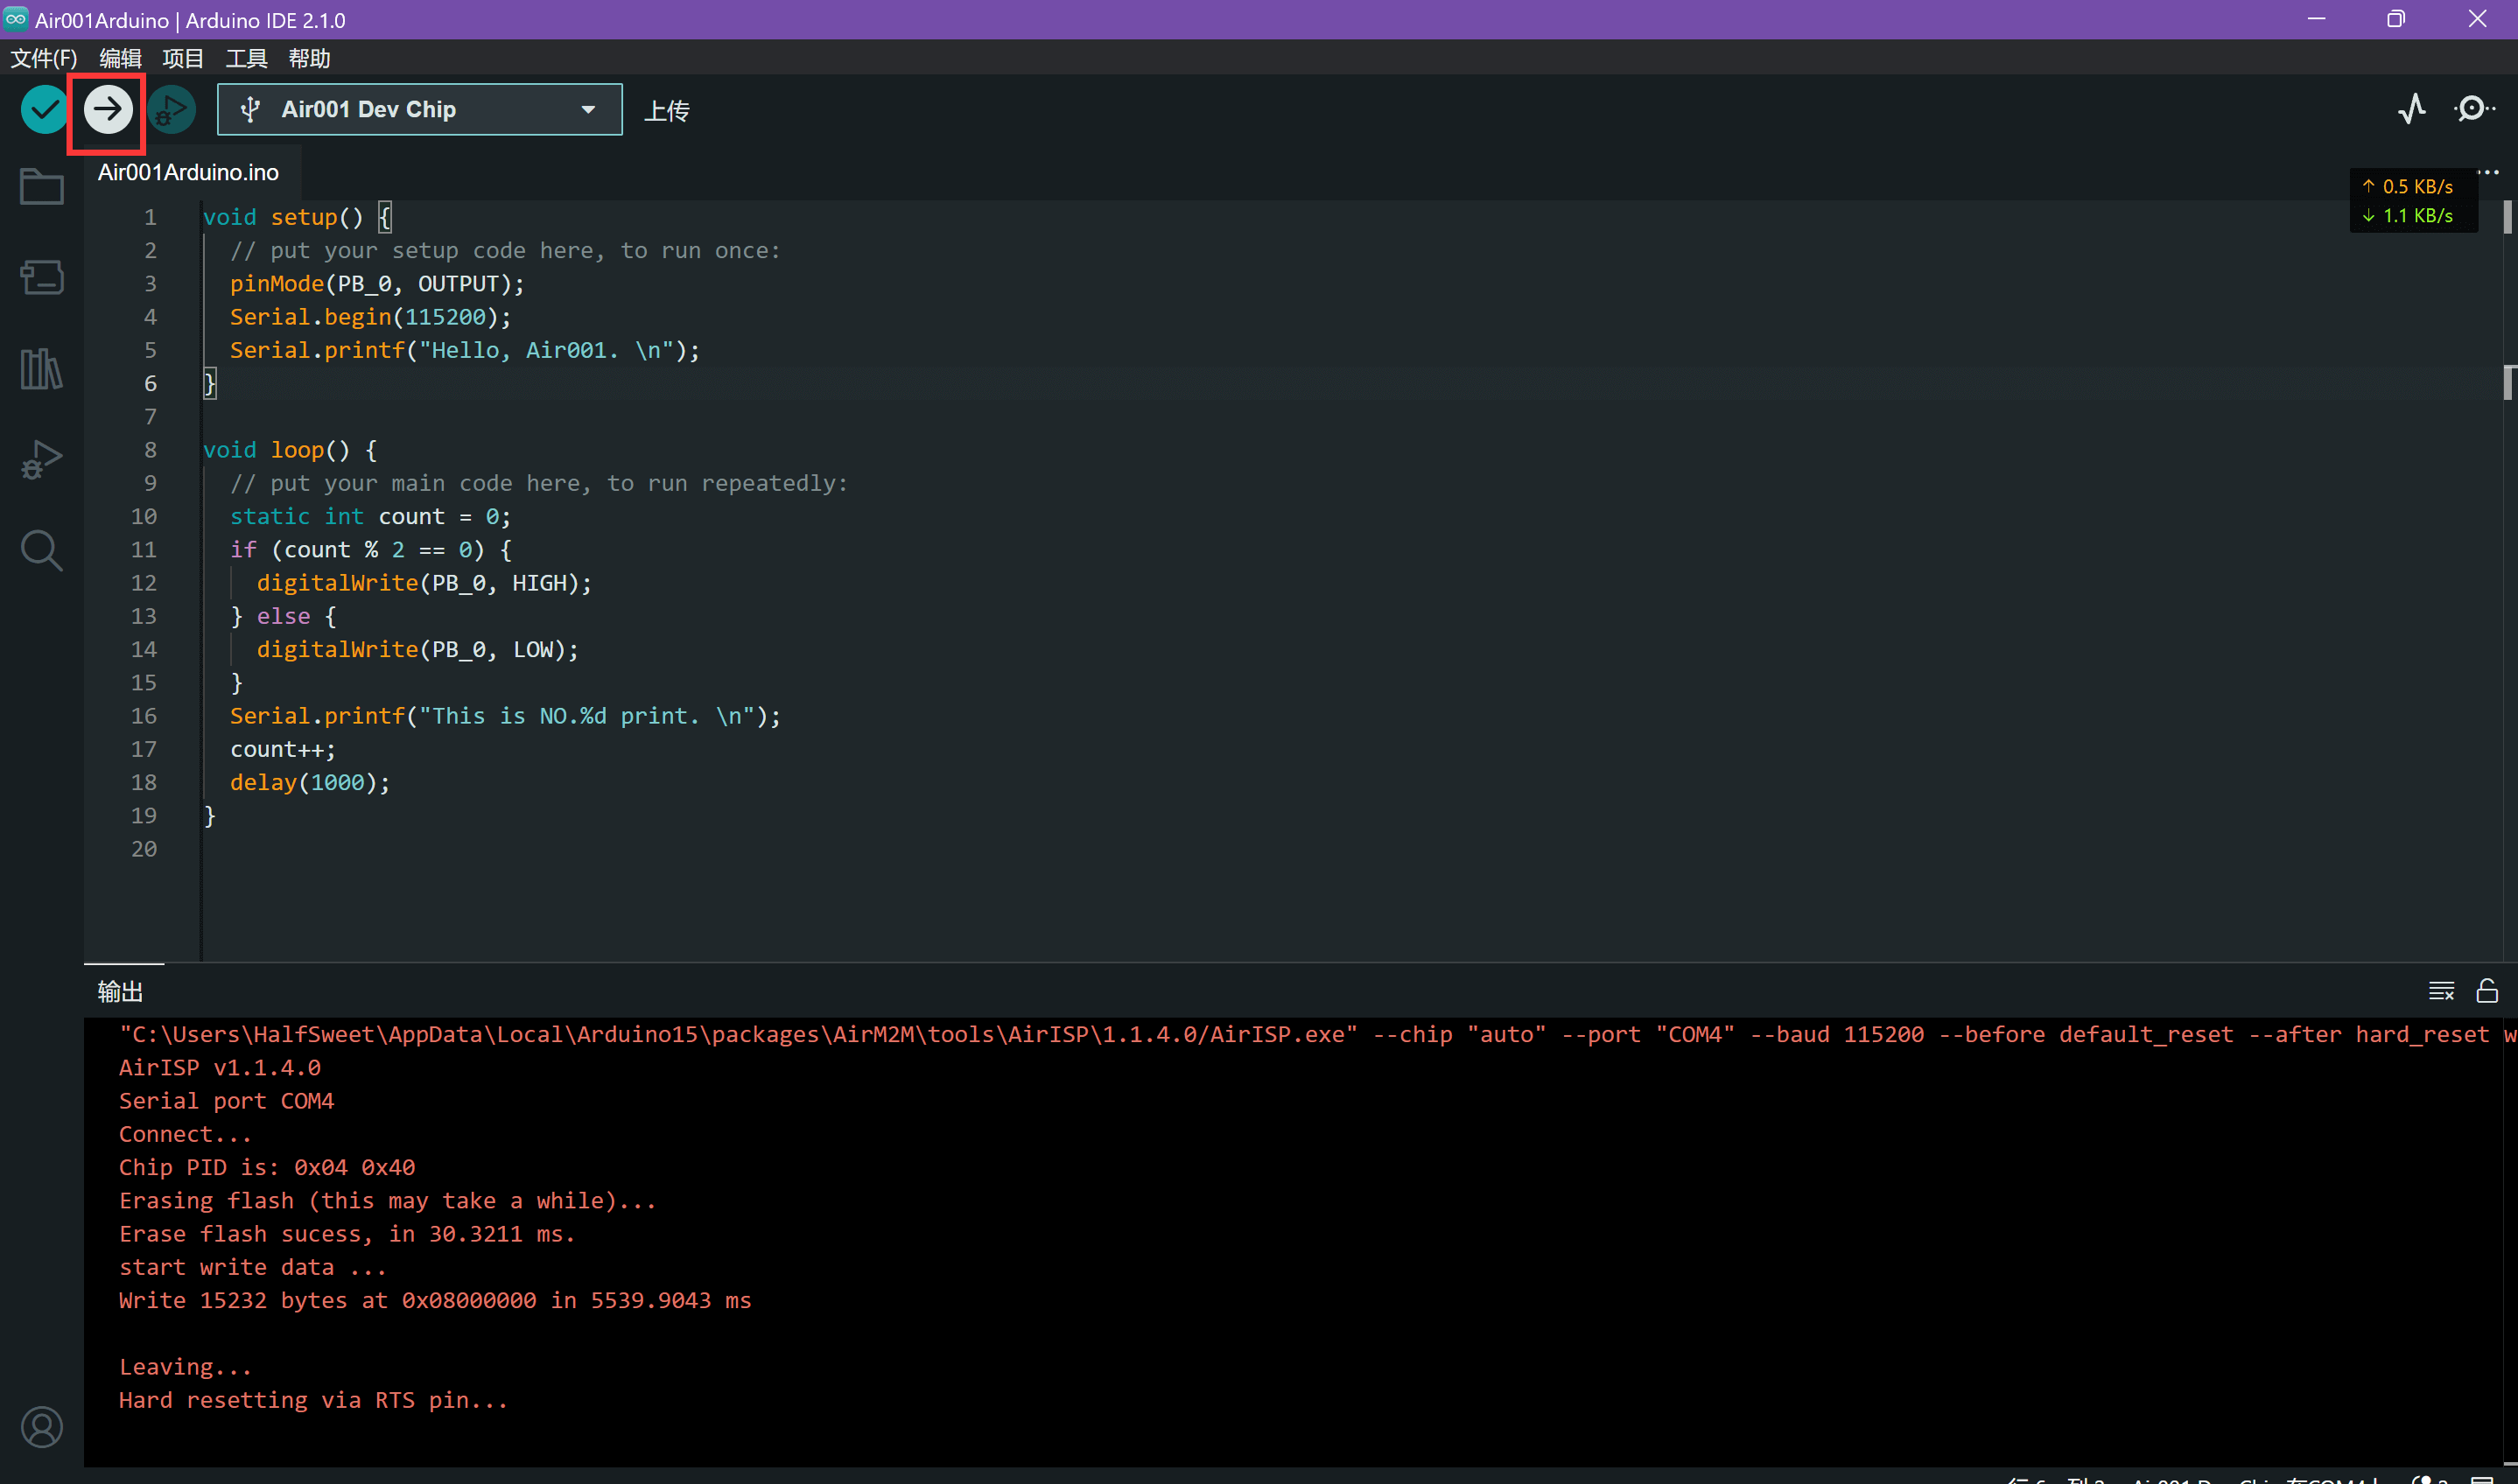
点击上传按钮,等待编译并上传测试代码

查看串口输出
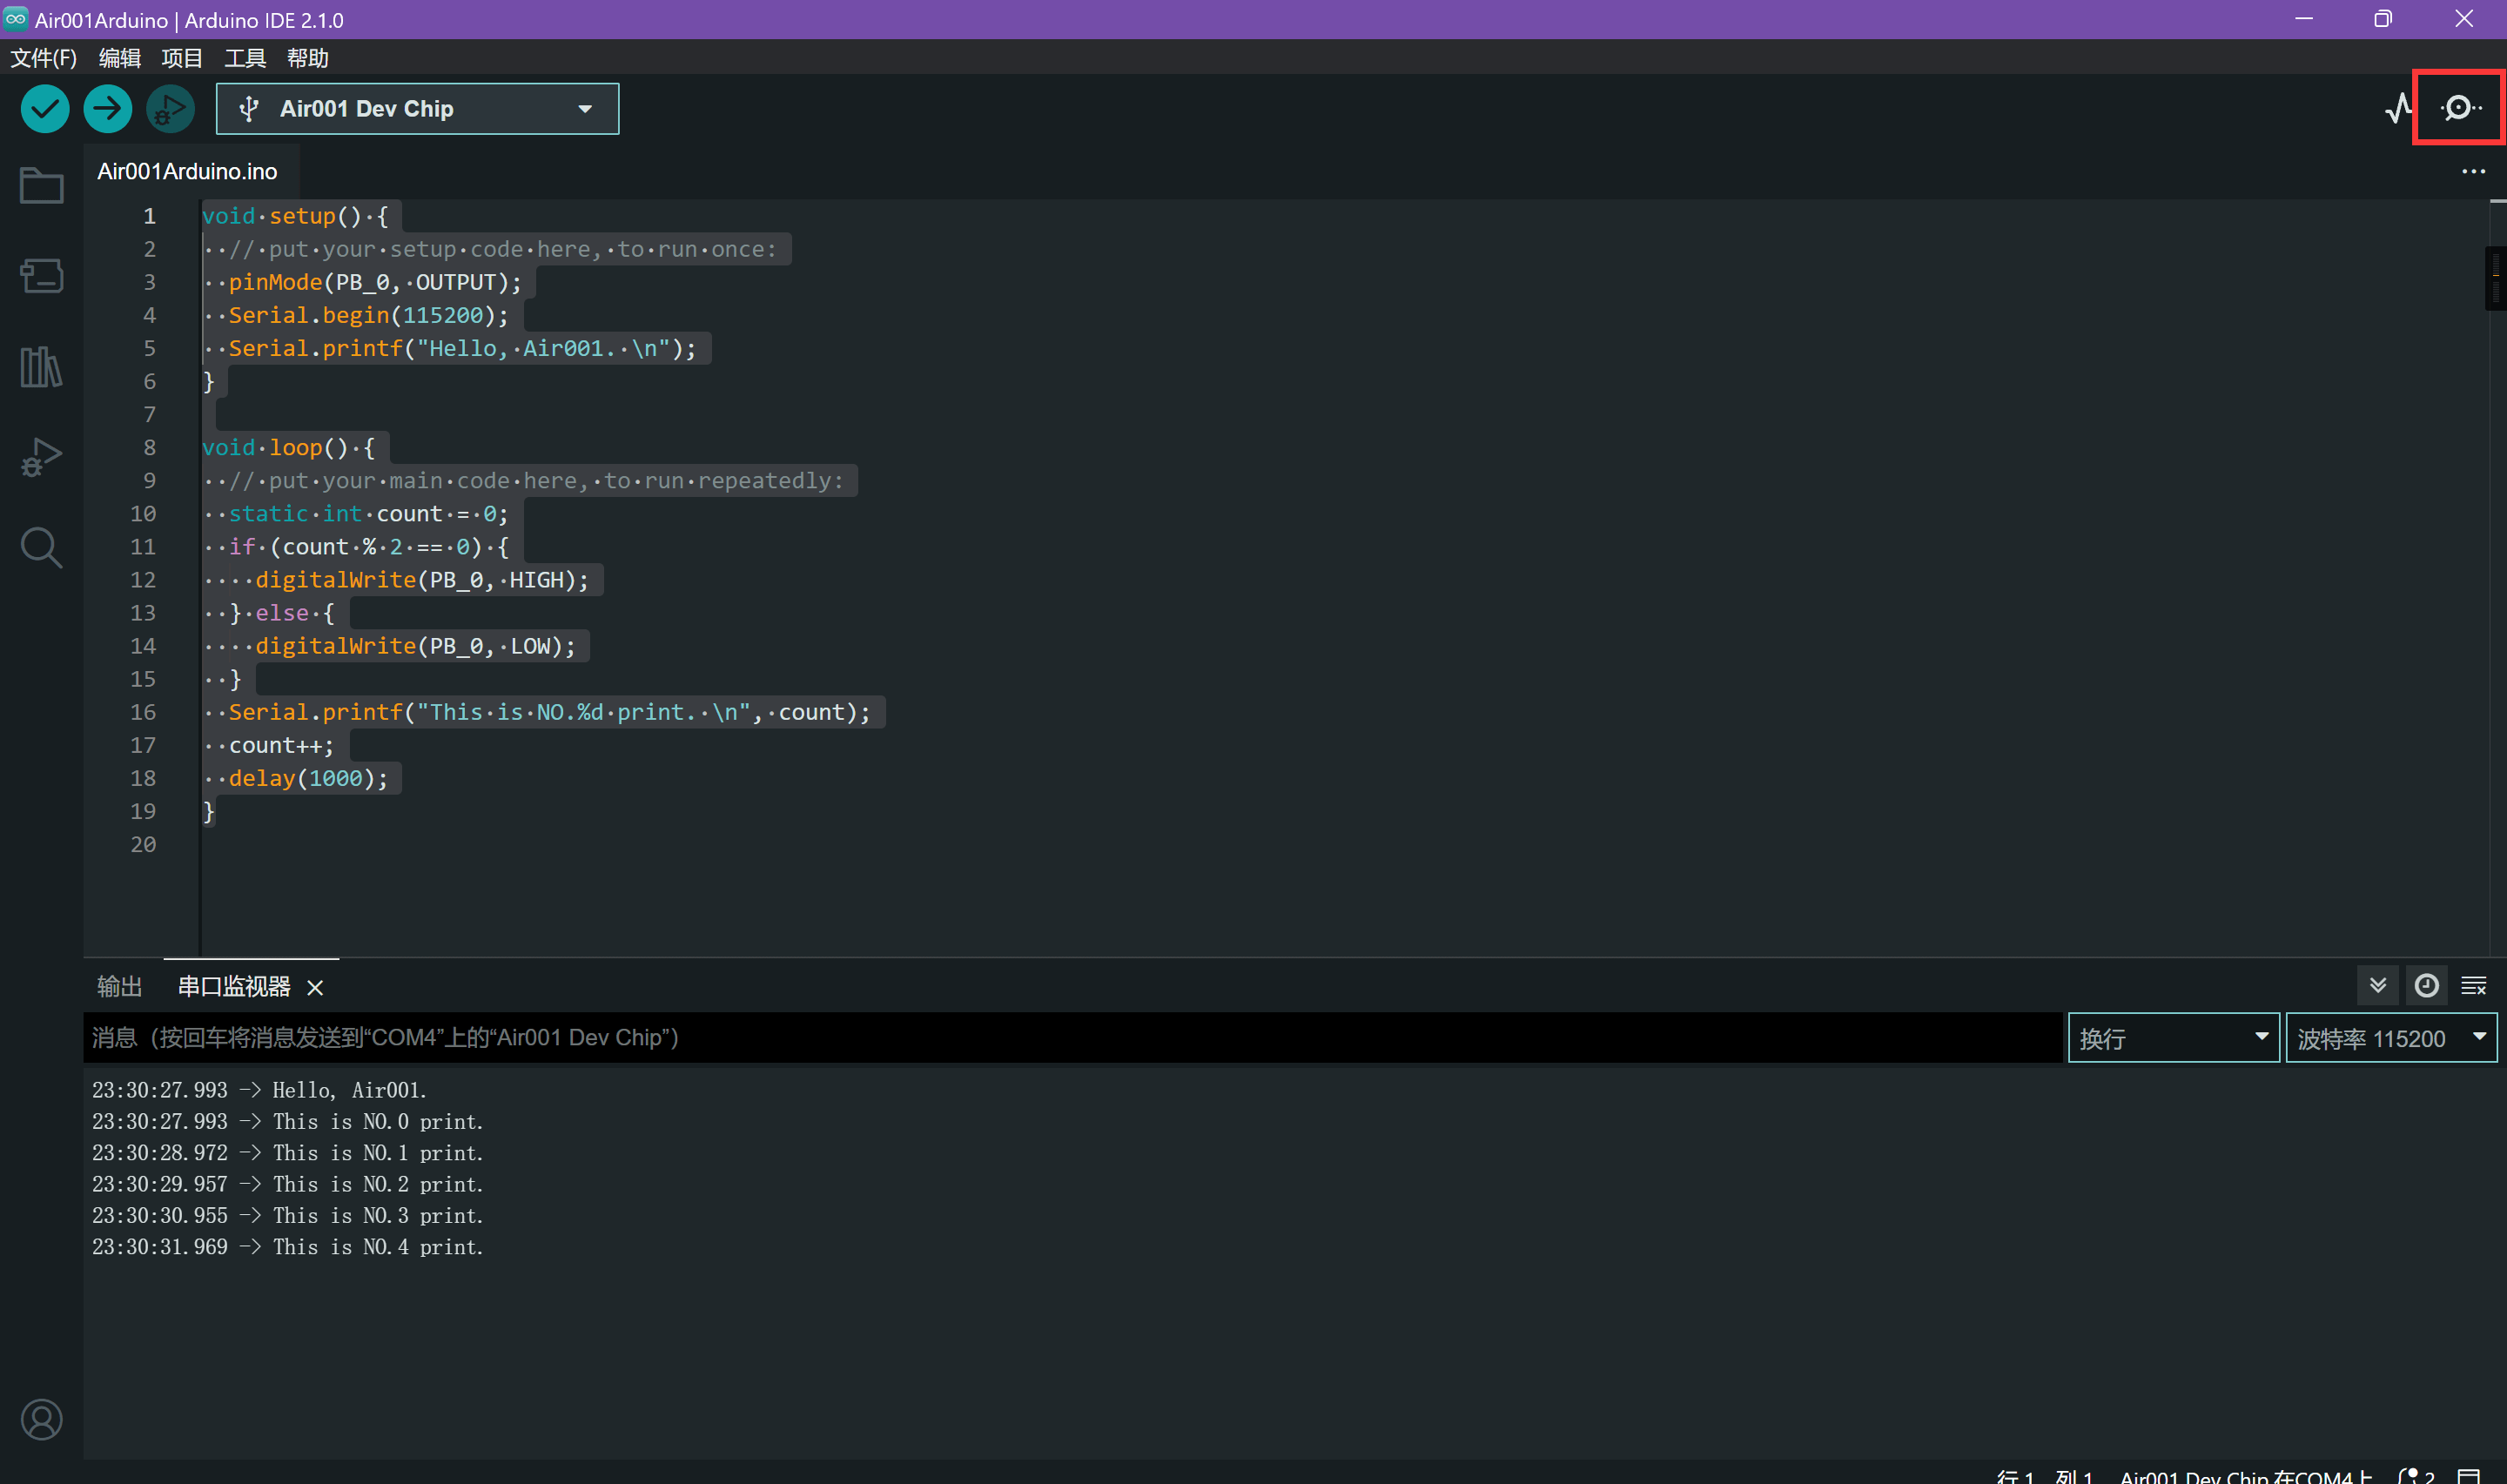
如果代码编译上传正常,那么打开串口监视器,即可看到输出的相关日志

并可观察到LED以1秒的间隔闪烁
接下来可以继续查看应用示例,测试更多的例子